

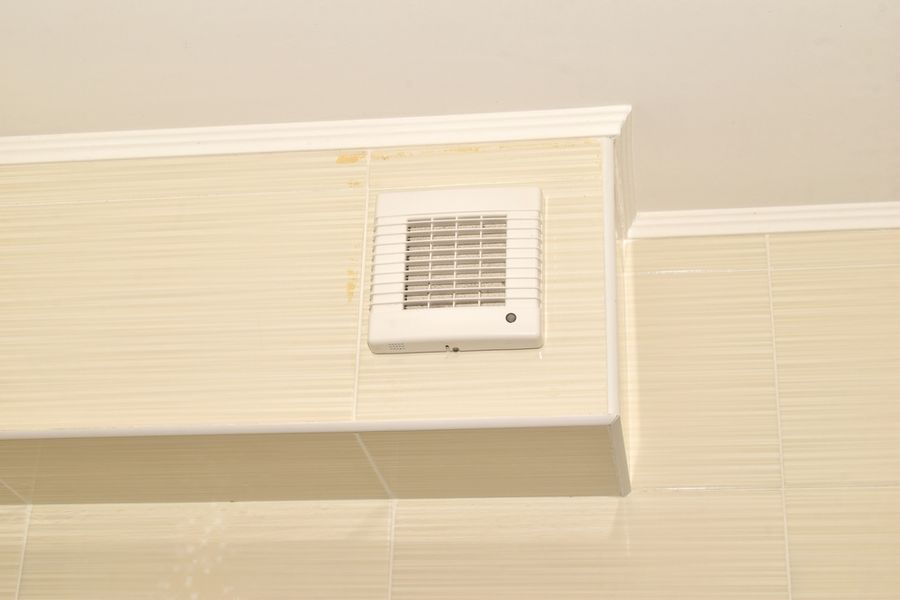
Older bathrooms often have no exhaust fan, no attic access, and no easy place to run a long vent duct. A through-wall exhaust fan can solve that problem by sending damp air straight through an outside wall. The project still needs careful planning because the wall may hide wires, pipes, framing, or old paint. Choosing the right fan, location, controls, and installer can make the upgrade safer, quieter, and more useful for everyday showers.
Why a Modern Through-Wall Fan Can Work Well
A bathroom fan should move damp, stale air out of the house rather than into an attic, crawl space, or wall cavity. A through-wall unit does this over a very short path. The fan sits inside an exterior wall and releases air through a cap on the outside. Fans that exhaust outdoors remove moisture and other indoor pollutants directly from the room.
This design can be helpful in an older home where there is no clear ceiling route. It may avoid cutting through several rooms or opening a large area of plaster. It can also reduce the number of duct joints that must be fitted and sealed.
However, a through-wall fan is only an option when the bathroom has a suitable outside wall. The chosen spot must also be clear of pipes, electrical cables, wall studs, exterior features, and fire-rated parts of the building. A bathroom in the middle of the house will usually need a ceiling fan, an inline fan, or another ducted system instead.
Choose a Current Model That Fits the Room
Start with airflow. Fan power is listed in cubic feet per minute, or CFM. For bathrooms up to 100 square feet, a common sizing guide is about one CFM for every square foot of floor area. A bathroom smaller than 50 square feet should still generally have at least a 50-CFM fan. A 60-square-foot bathroom would therefore need about 60 CFM or more.
Do not choose a very large fan simply because it sounds stronger. More airflow can bring more noise, and the room must have enough replacement air entering under the door or through another opening. Compare the fan’s tested CFM rating with its sound rating, which is shown in sones. Lower sone numbers mean quieter operation.
Current direct-discharge models show the kind of details shoppers should check. One available 70-CFM through-wall unit includes an outside wall cap and bird screen, requires no added duct run, and adjusts for walls between 5¼ and 10 inches thick. It can also work with separate humidity, motion, or countdown controls. That same model is rated at 6 sones and is not listed for installation over a bathtub or shower, showing why every specification matters.
Look for Useful Modern Features
A basic wall switch may be enough when household members remember to use the fan. In many homes, a countdown timer is more reliable. It lets the fan continue running for a set period and then turns it off without another trip to the bathroom.
A humidity-sensing control can start the fan when moisture rises. This may help in a guest bathroom, a child’s bathroom, or any room where the fan is often forgotten. Some through-wall units do not have a sensor inside the fan, but they can be paired with a separate humidity-sensing wall control.
Energy use and noise also deserve attention. Certified ventilation fans use about 48 percent less energy than standard models and must meet set limits for efficiency and sound. Not every direct-discharge wall fan carries that certification, so check the product listing rather than assuming that a new-looking model is efficient.
Inspect the Wall Before Making an Opening
Study both sides of the wall. Indoors, look for towel bars, mirrors, outlets, switches, plumbing fixtures, and tile. Outdoors, check for downspouts, meters, porch roofs, lights, vents, and places where snow or water may collect. The outside cap needs open space so its flap can move and the air can leave freely.
A wall scanner can help locate framing, but it does not replace a careful inspection. Bathrooms often have water lines, drain vents, and electrical cables in places that are not obvious. Installation instructions for through-wall units warn against cutting into hidden wiring or other utilities. They also call for installation and wiring by qualified people under the codes that apply to the home.
Older wall finishes need special care. Cutting painted plaster or drywall in a home built before 1978 may disturb lead-based paint. Renovation work can create lead dust, and paid contractors who disturb covered painted surfaces may need lead-safe certification. Homeowners should discuss testing and dust control before work begins.
Pick a Safe and Effective Location
Place the fan close enough to the moisture source to capture damp air, but follow the model’s wet-location limits. A fan should not go over a shower or tub unless its safety listing and instructions clearly allow that placement. Many direct-discharge utility-style wall fans are not approved for that area.
A high wall position often captures warm, damp air well. Even so, the exact height will depend on the wall framing, outdoor clearance, fan design, and local rules. The location must also allow the inner grille or motor to be reached later for cleaning and service.
Air must be able to enter the bathroom as the fan removes it. A closed door that seals tightly against the floor can limit airflow. Bathroom ventilation guidance calls for a path for replacement air, often through space beneath the door, and recommends running the fan for about 20 minutes after bathroom use. A timer makes that easier.
Plan the Electrical Work and Controls
Most installed through-wall fans are connected to household power rather than plugged into a nearby receptacle. This means the job may involve a new cable, a switch box, grounding, and protection required by local electrical rules. A licensed electrician can check whether an existing circuit has enough capacity and whether the planned location needs added protection.
Decide on controls before the wall is opened. A normal switch is simple. A timer supports longer run times, while a humidity control can respond without someone remembering to press a button. Some households choose a control that combines manual use with an automatic moisture setting.
Fuel-burning equipment also deserves attention. The fan’s installation guide states that enough air must be available for proper combustion and for flue gases to vent without backdrafting. Bathroom exhaust fans can contribute to lower indoor pressure, which may affect natural-draft furnaces, water heaters, or fireplaces. In homes with non-sealed combustion appliances, ask a qualified installer whether combustion-safety testing is needed after the fan is installed.
Understand What Installation Involves
The installer first confirms the final location from both sides of the wall. A small test opening may be used to verify that the path is clear. The full opening should then be cut to the exact size given in the chosen model’s manual. Measurements differ between fans, so dimensions from another product should never be reused.
The wall sleeve or fan housing is fitted through the opening. The outdoor cap must face the correct way and sit flat against the siding or wall finish. Exterior edges are sealed using materials suited to the surface and local weather. Poor sealing can allow rain or drafts to enter around the unit.
After the housing is secure, the electrician completes the power and control connections. The motor, inner grille, and outside parts are then installed as directed. Plaster, masonry, stucco, thick tile, stone walls, and unusual siding may require special cutting and repair skills. These conditions often make professional installation the safer choice.
Test the Fan and Build a Simple Routine
Once the work is complete, turn on the fan and listen for scraping, rattling, or strong vibration. Check outside to confirm that the wall flap opens and air is leaving the house. The grille should sit firmly against the wall, and the exterior cap should show no gaps that could admit water.
Test the timer or humidity control several times. Steam from a normal shower should clear within a reasonable period, though the exact time will depend on room size, shower length, airflow, and replacement air. If mirrors and walls remain wet long after use, the fan may be too small, blocked, poorly placed, or unable to draw enough air into the room.
Keep the grille and fan parts clear of dust. Turn off power before cleaning and follow the product manual. Also inspect the outside cap from time to time for lint, insects, paint, or debris that could stop the flap from moving.
A Shorter Vent Path Can Be a Smart Upgrade
A through-wall exhaust fan can add useful ventilation to an older bathroom without building a long duct route through the ceiling. Success depends on more than cutting a hole and adding a fan. The model must fit the room, the wall must be suitable, and the unit must exhaust safely outdoors.
Begin by measuring the bathroom and identifying a possible exterior-wall location. Then have a qualified installer check the wall, electrical supply, fan listing, and local requirements before any cutting begins.